Everything you need to know about polygel for nails
If you are one of those who prefers to do a manicure at home and by your own means, the polygel for nails fits you like a glove. It is easy to apply and promises good results, as long as you use the right tools and products.
The method is a trend in hand grooming, since it exempts the use of purely acrylic systems and allows lengthening with a less risky substance. Its versatility is one of its main benefits, as is its elegant finish. What other goodness does technique have? Let’s see.
Table of Contents
What is polygel for nails?
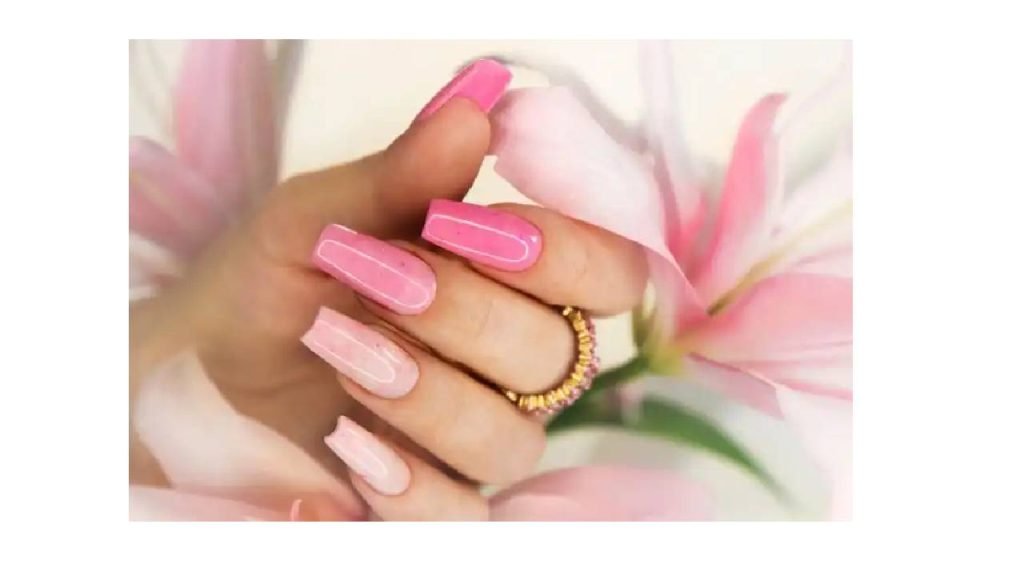
Polygel combines UV gel oligomers and acrylic polymers to encapsulate and sculpt nails. The consistency is similar to plasticine, but this flexibility does not detract from its firmness.
Resistance and durability are precisely the outstanding characteristics of this product. Its formulation reduces the risk of breakage and its lightness means that the manicure does not feel heavy.
Polygel nails last up to 1 month; then maintenance is relevant. As for the application, it is without mixtures, so you work directly on the nail, shaping and rebuilding when necessary. The final polish for this kind of arrangement has to be a gel finish, due to its semi-permanent quality and density.
Advantages of polygel for nails
The polygel does not give off strong odors, because it lacks chemicals that are present in other pigments. A detail in favor of this variety of gel is that it allows the growth of the natural nail, without harming the structure.
You can find it in nude or neutral tones , which means that you will have an ideal base to color or design on the nail later. And removing it is as simple as putting it on, because you only have to polish without using acetone. We expose additional advantages.
Fast dry
The acrigel dries in a lamp; if you use an excellent quality one, the nails will be ready quickly. Make sure that the artifact is LED light, since curing or photopolymerization in most lamps is through ultraviolet A light, related to cell damage and aging, as well as the increased risk of skin cancer.
easy application
For those who opt for an at-home manicure, polygel simplifies the process as you shape, file, and correct the edges. In stores you can find kits with the supplies and equipment required for this project. They have instructions and, if you don’t understand them, take advantage of the videos on the internet.
The consistency of the polygel only allows it to move if you touch it with a special brush, so it will not spread on the nail. In fact, you supply an amount to each one and work on them simultaneously.
They do not contain monomers
The use of nail cosmetics with styrene monomers can cause dryness, rashes, irritation and burning on contact.
According to the New Jersey Department of Health , the effects of exposure to these substances also include headache, lightheadedness, dizziness, and fainting spells.
But polygel is monomer-free, so you’ll be safe from chemical fumes and nail health risks.
Correction of imperfections
You can repair errors that arise during application, contrary to what happens with manicures in which you have to wait for it to harden or dry.
Compatibility with other trends
By providing a polished and smooth finish, drawing on the nails is easy. The polygel is compatible with nail art and with inlays or rhinestones.
How to apply polygel for nails?
To execute the technique the main elements are the polygel and the polygel liquid. The rest of the materials are the drying lamp, polishers and files, a shaping brush and, if desired, dual system tips .
Remember that you can work directly on the natural nail. The procedure is detailed in 6 steps.
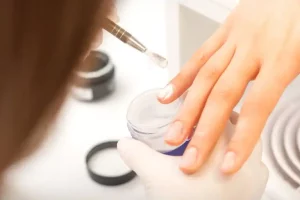
Prepare the nail: this phase is to supply a little gel on the base of the original nail or on the inside of the false nail.
Shaping: consists of shaping the gel, with the brush moistened in the polygel liquid.
Fix: press the ‘putty’ so that it adheres to the nail. If you use the dual system, mount the false one filled with polygel on the natural nail and press.
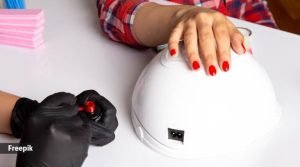
Curing: this is the drying phase , in which for 1 or 2 minutes the hand goes inside the LED fixture.
Take off: if you used acrylic nails on the natural base, once they dry, take off the polygel. They come off smoothly, but support yourself with a manicure tool if appropriate.
Decorate: you can leave the neutral tones of the polygel or do art nails . This completes the manicure.
Polygel and nail health
As with any method, it is necessary to ensure that the tools are sterilized; otherwise it would lead to nail infections.
Although this way of grooming your hands is considered minimally invasive, it would be nice to let your nails rest for a bit from the product. It takes a couple of weeks to put only moisturizers on them, covering the cuticles.
The Mayo Clinic advises moisturizing, to help prevent nails from chipping or breaking. Once the rest is over, your hands will be ready to return to the technique.